

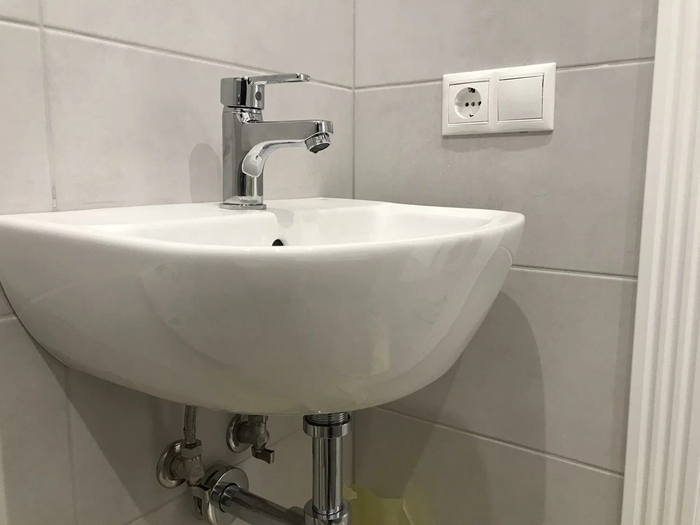
A properly installed sink not only ensures convenience but also the durability of the cabinetry, the tightness of its components, and the safety of its plumbing connections.
Errors during the marking, fastener selection, or sealing stages often lead to leaks, warping, and cracking of the ceramic.
Before starting work, it is important to determine the type of sink, the condition of the walls and floor, the location of the water outlets and drain, and consider access to the drain trap for maintenance. For complex remodeling projects and utility relocations, specialists are often called in, for example, as part of bathroom remodeling charlotte nc.
Installation Rules and Practical Tips
The standard installation height of the top edge of a sink is often 80–85 cm from the floor, but it is best to adjust it to the height of the users. Before drilling, be sure to check the level, mark the centerline of the sink, and ensure that the drain is aligned with the drain inlet or has sufficient clearance for movement.
- Check the wall: tile, drywall, and concrete require different fasteners.
- Assess access to shutoff valves and the ability to shut off the water.
- Dry-fit the sink, cabinet, and faucet before final fastening.
Fasteners and base: ensure reliability without distortion
Ceramics do not tolerate point loads: tighten nuts moderately, use spacers and washers. For wall-hung models, it is critical to hit a solid base or use reinforcement (embedded parts, fastening to studs/profiles).
- Mark the mounting points using a level.
- Drill the holes with a suitable drill bit (for tiles, carefully, without hitting the tile at the start).
- Install the dowels/anchors and secure the brackets or studs.
- Hang the sink and check the horizontal alignment.
Water and Drainage Connections: Sealing and Maintenance
It’s easier to install the faucet before installing the bowl, especially on inset and surface-mounted models. Do not twist or tighten the lines; leave a small amount of slack. Assemble the siphon strictly according to the manufacturer’s diagram, ensuring the sealing cones are seated correctly.
- FUM tape/thread is used on the threads as intended; Do not overtighten to avoid stripping the threads.
- Install the trap so that you can unscrew the cup/bottle for cleaning.
- Maintain the slope of the sewer line, avoid sagging corrugated pipes and unnecessary bends.
Sealing and Final Inspection
Seal the joints between the sink and the wall or countertop with sanitary silicone with antifungal additives. Apply the sealant to a clean and dry surface, then form the joint and remove any excess. After assembly, perform a pressure test and a large-volume drain test.
Benefits: Accurate markings, correct fastening for the wall material, careful assembly of the trap, and high-quality sealing ensure a stable, leak-free sink with easy access for maintenance.
Choosing a Bathroom Vanity Sink Type: Surface-Mounted, Wall-Mounted, Inset, or Pedestal-Mounted
The type of sink is selected based on three key parameters: the size and layout of the bathroom, the condition and material of the walls/partitions, and the usage scenario (frequency, number of users, storage availability). These factors influence not only the appearance but also the mounting method, installation complexity, access to utilities, and ease of cleaning.
Comparison of Popular Types
- Surface-Mounted (Bowl on Countertop) – an impressive look, with a wide variety of shapes; requires a countertop and precise height selection (consider the height of the bowl); a tall or wall-mounted faucet is often needed. The siphon is usually hidden in the cabinet/under the countertop, making it easy to access.
- Wall-Mounted (Wall-Mounted) – saves space, simplifies floor cleaning, and is suitable for small bathrooms; Requires a solid base (load-bearing wall or embedded/installation frame). Utilities often remain visible if a cabinet/cabinet is not provided.
- Inset (into the countertop from above or below) – a practical option for a cabinet: splashes are easier to control, storage is possible; perimeter sealing and the quality of the countertop (moisture resistance) are important. Undermount installation requires precise cutout dimensions and careful edge finishing.
- With a pedestal (“tulip”) – conceals the siphon and supply lines without a cabinet, visually neat; rests on the floor and is fixed to the wall, which reduces the strength requirements for the wall compared to a purely wall-hung design. Disadvantages: less storage space and more difficult access to utilities for maintenance.
-
- For a small bathroom: wall-hung or compact “tulip”; The priority is clear passage and easy cleaning.
- For family use: a built-in washbasin with a cabinet (storage, stability, easier to hide utilities) or a countertop washbasin if there is sufficient space.
For thin partitions: a tulip-shaped vanity or a solution with an installation frame; avoid heavy, unsupported wall-mounted vanities.
- For a design accent: a countertop basin, but be sure to calculate the final height and select the faucet/outlet.
Bottom Line: the optimal vanity is one that fits the room’s geometry, securely attaches to your wall/base, and provides easy access to the drain and connections. First, determine your space and mounting limitations, then choose the type (countertop, wall-mounted, inset, or pedestal), and only then the shape, material, and components.